修复 1:设置网络和 Internet 设置

当您无法访问特定文件或目录时,可以使用此修复程序。首先要这样做,

1.通过在搜索框中键入来打开控制面板

修复 – Windows 11 上的错误代码 0x80070043(Windows 无法访问) 修复 – Windows 11 上的错误代码 0x80070043(Windows 无法访问)

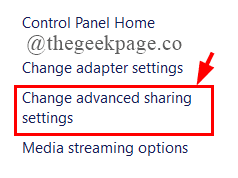
2. 单击网络和 Internet > 网络和共享中心。

修复 – Windows 11 上的错误代码 0x80070043(Windows 无法访问) 修复 – Windows 11 上的错误代码 0x80070043(Windows 无法访问)

3. 单击更改高级共享设置

修复 – Windows 11 上的错误代码 0x80070043(Windows 无法访问) 修复 – Windows 11 上的错误代码 0x80070043(Windows 无法访问)

4. 在“私人选择”下,单击“打开网络发现”和“打开文件和私人共享”旁边的单选按钮

修复 – Windows 11 上的错误代码 0x80070043(Windows 无法访问) 修复 – Windows 11 上的错误代码 0x80070043(Windows 无法访问)

5. 同样,在客人或公共选择下,做与上面相同的事情。

修复 – Windows 11 上的错误代码 0x80070043(Windows 无法访问) 修复 – Windows 11 上的错误代码 0x80070043(Windows 无法访问)

6. 现在,在所有网络下,单击第一个选项附近的单选按钮,如图所示。

修复 – Windows 11 上的错误代码 0x80070043(Windows 无法访问) 修复 – Windows 11 上的错误代码 0x80070043(Windows 无法访问)

7、在文件共享连接下,看到是如图设置的。

修复 – Windows 11 上的错误代码 0x80070043(Windows 无法访问) 修复 – Windows 11 上的错误代码 0x80070043(Windows 无法访问)

8. 在Password,单击如图所示的单选按钮。

修复 – Windows 11 上的错误代码 0x80070043(Windows 无法访问) 修复 – Windows 11 上的错误代码 0x80070043(Windows 无法访问)

9. 设置完所有内容后,单击“保存更改”。

修复 – Windows 11 上的错误代码 0x80070043(Windows 无法访问) 修复 – Windows 11 上的错误代码 0x80070043(Windows 无法访问)

10. 重新启动系统并查看错误是否已解决。

修复 2:更改文件夹属性。

要解决此错误,我们有时需要设置您希望打开的文件夹属性。为此,

1.右键单击您遇到问题的文件夹或文件,然后选择属性。

修复 – Windows 11 上的错误代码 0x80070043(Windows 无法访问) 修复 – Windows 11 上的错误代码 0x80070043(Windows 无法访问)

2. 在安全选项卡下,单击编辑。

修复 – Windows 11 上的错误代码 0x80070043(Windows 无法访问) 修复 – Windows 11 上的错误代码 0x80070043(Windows 无法访问)

3. 单击添加。

修复 – Windows 11 上的错误代码 0x80070043(Windows 无法访问) 修复 – Windows 11 上的错误代码 0x80070043(Windows 无法访问)

4. 输入每个人。

修复 – Windows 11 上的错误代码 0x80070043(Windows 无法访问) 修复 – Windows 11 上的错误代码 0x80070043(Windows 无法访问)

5. 现在,选择“所有人”并选中“允许”下的框,然后单击“应用”。

修复 – Windows 11 上的错误代码 0x80070043(Windows 无法访问) 修复 – Windows 11 上的错误代码 0x80070043(Windows 无法访问)

6. 在共享选项卡下,单击共享

修复 – Windows 11 上的错误代码 0x80070043(Windows 无法访问) 修复 – Windows 11 上的错误代码 0x80070043(Windows 无法访问)

7. 现在,选择Everyone并在Permission下选择Read/Write。单击共享。

注意:您将被要求向公众共享访问权限,单击是。

修复 – Windows 11 上的错误代码 0x80070043(Windows 无法访问) 修复 – Windows 11 上的错误代码 0x80070043(Windows 无法访问)

8. 最后点击完成并重新启动您的系统。

修复 – Windows 11 上的错误代码 0x80070043(Windows 无法访问) 修复 – Windows 11 上的错误代码 0x80070043(Windows 无法访问)

修复 3:在安全模式下清除临时文件夹

如果问题是由于条件错误导致的,您需要在安全模式下删除扩展名为 .tmp 或 .temp 的临时文件。这样做:

1.按Win+I打开设置,点击系统>恢复。

修复 – Windows 11 上的错误代码 0x80070043(Windows 无法访问) 修复 – Windows 11 上的错误代码 0x80070043(Windows 无法访问)

2. 单击立即重新启动。

修复 – Windows 11 上的错误代码 0x80070043(Windows 无法访问) 修复 – Windows 11 上的错误代码 0x80070043(Windows 无法访问)

3. 系统将进入自动修复模式。

修复 – Windows 11 上的错误代码 0x80070043(Windows 无法访问) 修复 – Windows 11 上的错误代码 0x80070043(Windows 无法访问)

4. 单击高级选项。

修复 – Windows 11 上的错误代码 0x80070043(Windows 无法访问) 修复 – Windows 11 上的错误代码 0x80070043(Windows 无法访问)

5. 单击疑难解答。

修复 – Windows 11 上的错误代码 0x80070043(Windows 无法访问) 修复 – Windows 11 上的错误代码 0x80070043(Windows 无法访问)

6. 在高级选项窗口中,单击启动设置。

修复 – Windows 11 上的错误代码 0x80070043(Windows 无法访问) 修复 – Windows 11 上的错误代码 0x80070043(Windows 无法访问)

7. 按F5以启用网络安全模式启动

修复 – Windows 11 上的错误代码 0x80070043(Windows 无法访问) 修复 – Windows 11 上的错误代码 0x80070043(Windows 无法访问)

8. 现在,您需要使用密码登录。

9.一旦系统启动,按Win+R打开运行对话框并输入%temp%

修复 – Windows 11 上的错误代码 0x80070043(Windows 无法访问) 修复 – Windows 11 上的错误代码 0x80070043(Windows 无法访问)

10. 选择所有文件,右键单击并删除它们。

修复 – Windows 11 上的错误代码 0x80070043(Windows 无法访问) 修复 – Windows 11 上的错误代码 0x80070043(Windows 无法访问)

11. 重新启动系统并查看错误是否已修复。

修复 4:运行 SFC 和 DISM 扫描

您计算机中的系统文件可能已损坏,并最终显示错误 0x80070043。我们需要运行 DISM 和 SFC 扫描来解决这个问题。请按照以下步骤操作:

1. 在运行窗口中输入cmd并按Cltr+Shift+Enter以打开 Elevated Command Prompt。

修复 – Windows 11 上的错误代码 0x80070043(Windows 无法访问) 修复 – Windows 11 上的错误代码 0x80070043(Windows 无法访问) 2. 现在,输入下面给出的命令并按Enter 键
sfc /scannow
修复 – Windows 11 上的错误代码 0x80070043(Windows 无法访问) 修复 – Windows 11 上的错误代码 0x80070043(Windows 无法访问)

3. 扫描完成后,关闭命令提示符并重新启动计算机。

4. 再次打开类似于步骤 1 的提升的命令提示符。

5. 现在,输入下面给出的命令并按Enter。

Dism /Online /Cleanup-Image /RestoreHealth

修复 – Windows 11 上的错误代码 0x80070043(Windows 无法访问) 修复 – Windows 11 上的错误代码 0x80070043(Windows 无法访问)

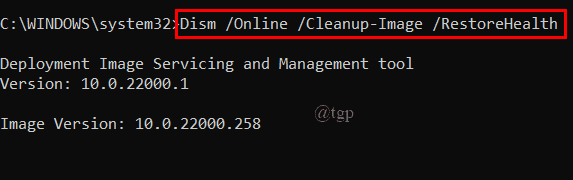
注意:将您的系统连接到稳定的互联网连接,因为这使用 Windows 更新组件来下载和安装损坏的系统文件的等效项。

6. 完成后,输入exit并关闭命令提示符。

修复 – Windows 11 上的错误代码 0x80070043(Windows 无法访问) 修复 – Windows 11 上的错误代码 0x80070043(Windows 无法访问)

7. 重新启动系统并查看错误是否已解决。

修复 5:使用系统还原实用程序

如果您最近修改了系统,这些更改可能会干扰您的系统操作系统并导致错误 0x80070043。请按照以下步骤解决问题。

注意:您在应用恢复功能之前所做的任何更改都将被删除。这包括所有已安装的应用程序、游戏、应用程序和其他软件

1. 通过在搜索框中键入来打开控制面板。

修复 – Windows 11 上的错误代码 0x80070043(Windows 无法访问) 修复 – Windows 11 上的错误代码 0x80070043(Windows 无法访问)

2. 在控制面板中搜索恢复。

修复 – Windows 11 上的错误代码 0x80070043(Windows 无法访问) 修复 – Windows 11 上的错误代码 0x80070043(Windows 无法访问)

3. 单击打开系统还原

修复 – Windows 11 上的错误代码 0x80070043(Windows 无法访问) 修复 – Windows 11 上的错误代码 0x80070043(Windows 无法访问)

4. 在打开的窗口中,单击下一步。

修复 – Windows 11 上的错误代码 0x80070043(Windows 无法访问) 修复 – Windows 11 上的错误代码 0x80070043(Windows 无法访问)

5. 现在,选择还原点并单击下一步。

修复 – Windows 11 上的错误代码 0x80070043(Windows 无法访问) 修复 – Windows 11 上的错误代码 0x80070043(Windows 无法访问)

6. 选择正确的还原点后,单击完成。

修复 – Windows 11 上的错误代码 0x80070043(Windows 无法访问) 修复 – Windows 11 上的错误代码 0x80070043(Windows 无法访问)

7. 进程启动后,系统将重新启动并挂载之前的状态。最后,查看错误是否解决。

修复 6:使用第三方软件

您可以简单地使用第三方软件来修复您的错误。这有助于检测和消除常见的计算机错误,有助于保护您的硬件问题以及优化您的设备性能。我们在这里使用的工具是 Restoro。你可以从这里下载

1.点击快捷图标打开Restoro,在弹出的窗口点击是。

修复 – Windows 11 上的错误代码 0x80070043(Windows 无法访问) 修复 – Windows 11 上的错误代码 0x80070043(Windows 无法访问)

2. 工具开始分析和检测错误。

修复 – Windows 11 上的错误代码 0x80070043(Windows 无法访问) 修复 – Windows 11 上的错误代码 0x80070043(Windows 无法访问)

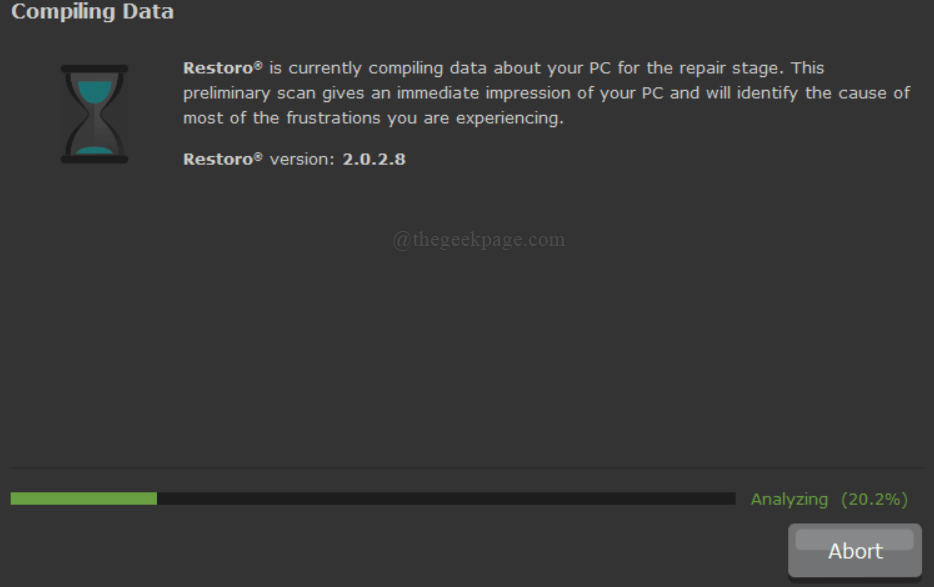
3. 单击开始修复以修复所有损坏的应用程序和文件。

修复 – Windows 11 上的错误代码 0x80070043(Windows 无法访问) 修复 – Windows 11 上的错误代码 0x80070043(Windows 无法访问)

修复 7:执行修复/全新安装

如果以上所有修复都没有帮助您解决问题,最后一次尝试可以是对您的操作系统执行全新安装或修复安装,这将重置包括启动数据在内的所有 Windows 组件。

干净安装

1. 确保您的系统兼容安装 Windows 11。您可以使用 PC Health Check 应用程序进行检查。从这里下载。

修复 – Windows 11 上的错误代码 0x80070043(Windows 无法访问) 修复 – Windows 11 上的错误代码 0x80070043(Windows 无法访问)

2. 将 PC 上的文件和应用程序备份到 One Drive 或外部硬盘。这样做是因为全新安装将删除所有文件和程序。

3. 您可能需要 Windows 11 的产品密钥。在大多数情况下,它将使用已安装的 Windows 产品密钥。

4. 从此处下载创建 Windows 11 安装介质。安装它。

注意:这用于执行全新安装。

修复 – Windows 11 上的错误代码 0x80070043(Windows 无法访问) 修复 – Windows 11 上的错误代码 0x80070043(Windows 无法访问)

5. 重新启动您的 PC。PC 重新启动后,按F2键以获取所有启动选项并按照设置流程和安装 Windows 11

修复安装

1. 在搜索框中键入重置此电脑,然后按 Enter。

修复 – Windows 11 上的错误代码 0x80070043(Windows 无法访问) 修复 – Windows 11 上的错误代码 0x80070043(Windows 无法访问)

2. 单击重置 PC。

修复 – Windows 11 上的错误代码 0x80070043(Windows 无法访问) 修复 – Windows 11 上的错误代码 0x80070043(Windows 无法访问)

3. 您可以根据需要选择选项。

修复 – Windows 11 上的错误代码 0x80070043(Windows 无法访问) 修复 – Windows 11 上的错误代码 0x80070043(Windows 无法访问)

4. 单击第二个选项。

修复 – Windows 11 上的错误代码 0x80070043(Windows 无法访问) 修复 – Windows 11 上的错误代码 0x80070043(Windows 无法访问)

5. 最后点击重置。

修复 – Windows 11 上的错误代码 0x80070043(Windows 无法访问) 修复 – Windows 11 上的错误代码 0x80070043(Windows 无法访问)

修复 8:激活 LAN 引导策略

此修复主要用于 Windows 10,因为 Windows 11 家庭版没有本地组策略编辑器。如果您使用的是 Windows 11 专业版、企业版和教育版,则可以使用此修复程序

1. 打开“运行”窗口,输入gpedit.msc,然后按 Enter。

修复 – Windows 11 上的错误代码 0x80070043(Windows 无法访问) 修复 – Windows 11 上的错误代码 0x80070043(Windows 无法访问)

2.现在,选择本地计算机策略 > 计算机配置 > 管理模板。

修复 – Windows 11 上的错误代码 0x80070043(Windows 无法访问) 修复 – Windows 11 上的错误代码 0x80070043(Windows 无法访问)

3. 单击系统 > 登录。

修复 – Windows 11 上的错误代码 0x80070043(Windows 无法访问) 修复 – Windows 11 上的错误代码 0x80070043(Windows 无法访问)

4. 在登录文件夹中,右键单击计算机启动和登录时始终等待网络,单击编辑。

修复 – Windows 11 上的错误代码 0x80070043(Windows 无法访问) 修复 – Windows 11 上的错误代码 0x80070043(Windows 无法访问)

5. 现在,单击已启用。

修复 – Windows 11 上的错误代码 0x80070043(Windows 无法访问) 修复 – Windows 11 上的错误代码 0x80070043(Windows 无法访问)

6. 重新启动系统以查看错误是否消失。